|
|
Windows Mobile
and Windows PC User Guide |
|
|
|
|
|
|
Step 1 - Setting up a match
Start ProTracker Tennis from the icon.
.jpg) |
__ |
Enter the players' names, or select them from the drop down lists if you have
tracked them previously.
For doubles matches use '+' or '&' symbols
between the player's names.
Then enter information about the match, the Event, Court surface and Match format.
If you are tracking a video of match the date can also be changed by tapping
on it.
Make sure the match format is correctly entered:
-
the number of Sets, 1, 3 or 5
-
the minimum number of games needed to win a set
(usually 6)
-
the Set formats of the match (the Last Set is often different from other sets, maybe
just a 7 or 10 point tie-break)
-
for matches where the first point after 'deuce' wins
the game, set No-Ad, where the point is decided at the second deuce, set
One-Ad.
|
|
.jpg) |
|
After selecting the Court Surface you can choose colors for the court
surround and inner. Either tap on the pre-defined colors of select any
colour you like using the graded palette and brightness bar.
Tip:
You can adjust the court colors any time
you like during the match - something to do during change-of-ends.
Tap the Start >>> button to start tracking.
|
.jpg)
|
|

|
|
|
|
|
|
|
|
|
|
|
Step 2 - Tracking
.jpg)
|
The Score screen is displayed. The first thing you must
do is indicate which player is to serve first - Tap on the player's name.
For Doubles matches you will also be prompted to select
the player who is receiving serve first. These prompts will be made
again at the start of each Set and after the first game of each Set.
A Tennis court will be displayed on the screen.
Tip:
If you are standing at the side of the court,
rather than the end, just rotate your iPhone, iPad or iPod Touch and the
court will be presented landscape, with
prompts and menus appearing correctly.
During a match flashing text prompts will indicate the action needed, as follows:
|
__ |
Tap Server End - Tap on the end of the court from which the server
will serve.
.jpg) |
|
|
|
First Serve and Second Serve
-
For Serves that are In, Out or
Netted Tap on the court at the position where the ball
bounced, or hit the net.
-
For Aces and
Serve Winners, and accurate shot positionning, Touch-and-Move
your finger on the court and lift your finger
at the position where the ball bounced, or hit the net, select an option from the
pop-up menu of outcomes that appears.
Tip:
The first option in the list will be Tapped automatically for you after a
short pause
-
To move the server position, Tap to the left or right of the
racket. Tap on the Racket itself to record a Foot Fault.
Note:
You can choose to
have the Shot Outcome menu always displayed by changing the Settings, see
the section on this later in the User Guide.
|
.jpg) |
.jpg) |
|
|
|
|
|
Tap Serve Side will appear for sudden-death deuce points. Tap on the
side of the court where the serve is being played.
Return Outcome
This prompt will appear only if you have chosen to
track Serve Returns.
-
For Returns that are In, Out or
Netted Tap on the court
at the
position where the return ball bounced, or hit the net.
-
For Winning
Returns and other outcomes, and accurate shot positionning,
Touch-and-Move
your finger on the court and lift your finger
at the position where the ball bounced, or hit the net, select an option from the pop-up menu that appears.
Note:
The
position from where the Return was played from is calculated from the angle and
depth of the serve. It would not be practical for you to tap this in
manually. |
.jpg) |
.jpg) |
|
|
|
|
Key Shot
When the point ends decide if the key ending shot
in the rally was an error or a winning shot.
Tap or Touch-and-Move on the court at the position where the
shot was played from. Two pop-up menus of shot types will appear in
succession from which the type of shot that was played can be entered.
If you are tracking a doubles match, you will
also be prompted for the name of the player who made the key shot.
|
.jpg) |
.jpg) |
|
Shot Outcome
Touch-and-Move on the court at the position where the ball
bounced, or hit the net, and select an option from the pop-up menu of
outcomes that appears.
Tip: the first option in the list is usually the one
required and it will be Tapped automatically for you after a short pause - or
just Tap the screen for the default option.
|
|
.jpg)
|
.jpg)
|
.jpg)
|
|
|
|
|
|
|
|
|
|
If you make a mistake Tap the symbol by the net, and select
Undo. You can press undo as many times as required to
reverse multiple mistakes.
.jpg) |
|
Other options are available from this button.
You can record Missed serves, returns, points or games - if you
don't know who won the point or game that you missed, assign it to '?' and
resume tracking - when you next discover the score, record the missed Point
or Game again against the correct player.
If players go to the wrong
end or serve from the wrong end or the wrong player starts serving, which
typically might happen after a tie-break, you can follow this by
pressing the Switch button.
Tip: For No-Ad scoring use the Switch > Serve
Court option if the receiver elects to receive in the Ad-court.
If the player's decide to play a
tie-break unexpectedly, this can be indicated with the Set Tie-Break button. This option will only be available when the game scores are even, and its
love-all.
An important aspect of tracking is to record
Comments for future reference. This can either be done from the
score form (Actions menu), which is displayed at each change-of-ends, or on
the court input form. Pre-defined comments can be entered by clicking on the
drop-down list or you can tap-in a new comment (which will then be added to
the pre-defined list for another time). |
|
Tap the button with the player that the comment refers to
on the pop-up dialog that appears. The comments will appear on the Momentum
Chart.
.jpg) |
|
|
|
|
|
|
At each change of ends the score screen will be displayed. On here is a
summary set of stats. Press the
Continue >>> button when the players resume. |
|
Tracking will stop automatically when the
match is won or lost. Or, if the match ends prematurely tap the Early End
menu option, for retirements, disqualifications or if the match is
abandoned.
.jpg)
|
|
You can now E-mail the match to yourself or a coach
who also has ProTracker Tennis, where the match can be analyzed and reports can be printed
(PC version).
Press the E-mail Match button and
enter the To address.
.jpg)
|
|
|
|
|
|
|
|
|
|
|
|
|
|
Step 3 - Saving and Loading matches
Every point tracked in a match is automatically saved to a match file - so
you can reload it or e-mail it for later analysis.
To load a saved match, enter the players' names and the date of the match
and tap the Load >>> button. Alternatively you can browse for the match you
want from the File > Browse menu option. The option to
Sort and Filter
matches is available to help find particular previous matches. |
|
|
|
|
|
.jpg) |
|
Step 4 - Analyzing a match
The Analyze button can be used during or at the end of the match. The
following types of analysis are provided:
- Stats
- Scatter Diagrams
- Momentum Chart
|
|
.jpg) |
|
|
|
|
|
|
|
Stats - Detailed statistics can be shown, which can be filtered by
Set and Player - for doubles matches, Stats on individual players in a pair
can be shown.
Tip: Scroll to view more stats and Swipe to
view the Stats for individual Sets.
Serve Winners can be separated or counted with
other Forcing Errors; and, Forcing Errors can be separated or
counted just as Winners.
If you are tracking rally lengths, use the
slider to change the threshold for winning rally-length stats.
The
Aggressive Margin gives an overall understanding of how a match was won or
lost. It is a positive or a negative number showing whether a player is
playing positive tennis, or relying on the opponent to make more errors. In
ProTracker it's calculated as follows:
(Aces + Serve Winners + Winners + Forcing
Errors)
- (Double Faults + Unforced Errors)
The %'age
Aggressive Margin is this number as a proportion of the Total points played.
|
|
.jpg) |
|
.jpg) |
|
|
|
|
|
|
|
Scatter Diagrams – Serves, Returns and Key Shot directions and
outcomes can be viewed graphically. For Returns and Key Shots a line is drawn from the shot
position to the bounce position, at which a coloured ball is shown (green
for winner, red for out etc.) - a key can be displayed if required. Filters
let you select the player, shot, set and game score - so that you can
home-in on particular aspects of the play.
Tip: swipe left
and right to show different shots; swipe up and down to show different
players.
Useful information can be
obtained from the displays, such as which shots are producing errors and
where winners are coming from. Numerical Counts and %ages can be overlaid on
top of the shots. By default shots from each end are grouped
together but they can be separated if required - for example, to illustrate
the affect of a strong wind. |
|
|
|
|
|
|
.jpg) |
|
.jpg) |
|
.jpg) |
|
|
|
|
|
|
.jpg) |
|
.jpg) |
|
.jpg) |
|
|
|
|
|
|
|
Momentum Chart - The flow of points in the match can be seen to
pick out momentum swings and turning points. Often an incident during a
match, such as a disputed line call or long deuce game, can change the
outcome - this chart helps identify this and graphically illustrate it to
the player. Each time the player named at the top left of the screen wins a
point a line is drawn diagonally upwards, and downwards when the other
player wins a point.
The score and set times are shown along with any
comments that were recorded, and the line colour reflects which player is
serving. Shot outcomes are overlaid on the chart; the same coloured balls
used on the Scatter Diagrams are used. Serves and Returns are shown near the
player names and key shots along the match flow line - these enable you to
see at what stages in a match points are being decided by winners or by
errors, and the impact of serves.
You can home in on the detail of a point by selecting the Point Detail
option. In this mode the Replay facility is started at the point indicated,
and Comments and Rally lengths can be added and amended.
If you are tracking rally lengths,
these too can be overlaid on the Momentum Chart as gray bars of lengths
based on the rally length. This help show if shorter or longer rallies
are benefiting a particular player.
Tip: all the overlays
can be removed and re-displayed as required to help with analysing the
match. |
|
|
.jpg) |
|
.jpg) |
|
.jpg) |
|
|
|
|
|
|
|
Replay - Points can replayed one-by-one. Swipe left for the
next point and right for the previous point. When Replay is started
mid-match the most recent point will be shown, this can be useful to scroll
back through a game if players have forgotton the score.
Comments can be Added, Edited or Deleted (by clearing the comment text and
pressing one of the player name buttons), and Rally lengths can be adjusted
if these were not entered correctly at the time.
Tip: use
2-finger swipe left or right to skip to the next or previous Game and
3-finger swipe for the next or previous Set.
Tip: use the Match start and end options to insert Commnents before
or after the Match. |
|
|
.jpg) |
|
.jpg) |
|
.jpg) |
|
|
|
|
|
|
|
|
|
|
|
|
|
Settings, Data and Match Options
The Options > Settings menu item lets you define the level of tracking
you want to do and control how shots are entered.
|
|
Tracker Name - Your name should be entered here, it is used on e-mails
and to record who tracked the match.
If you don't select the option to
Track Serves and Key Shots, only the score will be tracked - buttons will appear
on the Score screen to tap-in the player who wins each point. Typically
this option would only be used by Umpires.
You can
choose if you want to track Serve Returns for each player. It is recommended
that you switch Return of Serve tracking off if you are having difficulties
keeping up with the play. Then turn it on again when you have more
experience.
.jpg)
With the Rally Lengths option selected you can record the shots in
each rally. Shot counts are incremented after the Serve and Return
have been entered - you need to swipe on the court screen or tap on a shot
counter that is displayed when the Key Shot prompt is displayed.
You
can choose one shot type by changing the Other type. Note,
the word used will apply to all you matches. |
|
By default when you tap the ball position on the court the normal outcome is
chosen automatically: In, Out, Netted or Winner depending on the position and
shot type. By using touch-and-move a menu of outcomes is displayed. You can
control when the menu of outcomes displayed by setting Use Default Shot
Outcome ... on Single Tap or on Double Tap. The
default option (which is the first
in the list) will also be chosen automatically after the menu is displayed for a
controllable time interval of 1 to 10 seconds. Choose the options that you
find easiest - you
may want to change them after tracking a few matches.
Because your thumb
or finger would obscure the ball or racket position being input, options are
provided when you Touch and Move on the court screen. You can
select to offset the touch point above (and to the side), or you
can show crosshairs. Both or neither option can be selected.
.jpg)
If you want you can to have the full score displayed on the court screen as
you enter shots, select the option to Show full score on court.
Otherwise only the point score in the game is displayed.
|
__ |
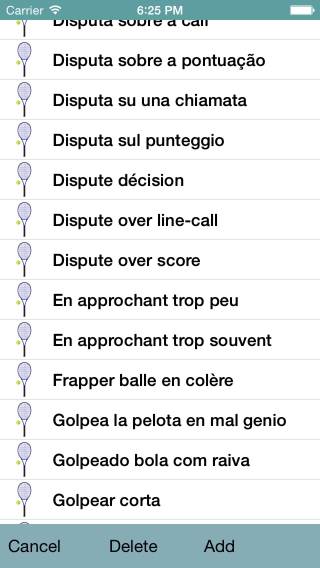
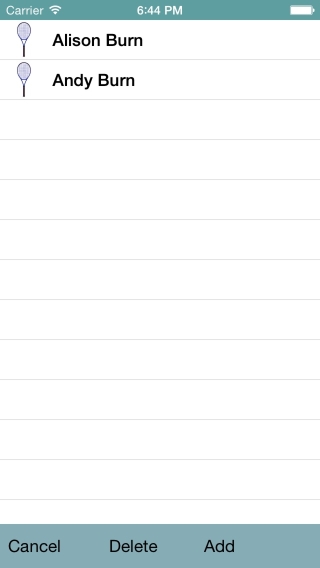
Data - lists are displayed for: Player
names, Events, Court Surfaces, Comments and Other Information. The
appropriate list is displayed by tapping the small symbol next to each text box.
From each list you can select the text value required, or you can Add a new
value or delete a value (by swiping over the text or by pressing the Delete
button).
When you enter text directly into a field the value will
be automatically added to the list, to save you typing next time it's needed.
|
|
Options used for a match are available, to
change the Court colors (Surround and Inner), Line color and Text color - these may need to be changed
if visibility is poor or you need to save battery life.
|
|
|
|
|
|
|
|
|
|
|